Getting Started with Timed Email Organizer for Office 365
This guide explains the basics of the Timed Email Organizer for Office 365, including account management, assigning users who can actually create the rules (which may be you, but who are we to say?), and creating your first rule.
For our example, we will create our first rule (to assign a red category to emails with a subject of “Rule Test”). After it runs, we will be able to see the effects of the rule by looking at the category of the emails in the Inbox and our lives will be made all the more better for it.
So to get started go to the Sperry Software 365 login page at https://www.SperrySoftware365.com:
[Figure 1 – SperrySoftware365 Home Page]
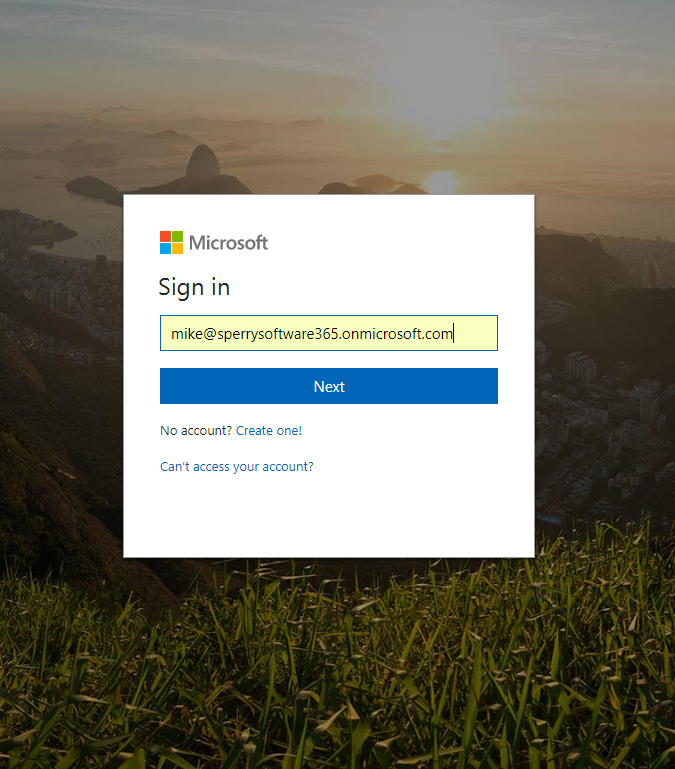
From here, you can sign in to your Office 365 email account. Note that this is the user’s email address, not necessarily the purchaser’s. Once you do, if this is your first time logging in you’ll be brought to the standard Microsoft Office 365 login:
[Microsoft’s Office 365 login page]
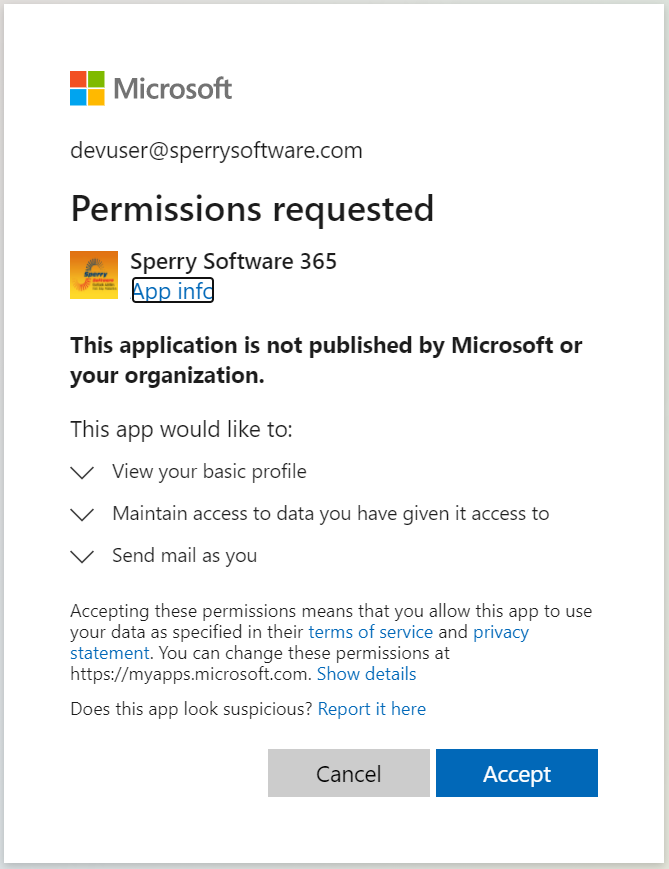
Login like usual, and accept the permissions if Microsoft prompts you to do so (it will prompt you if this is the first time you’ve logged in). This is what it looks like:
After that review and accept the permissions (again, if this is your first login).
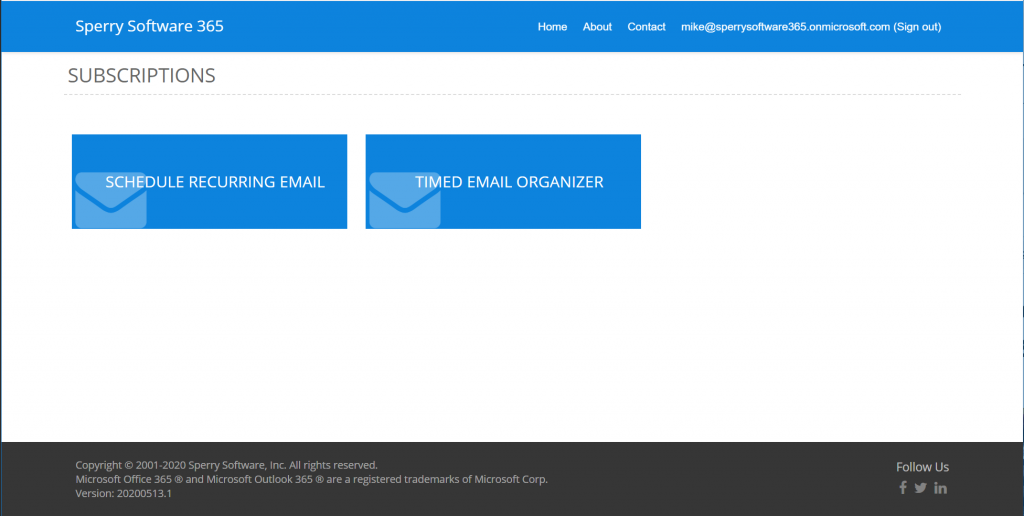
After you do, you’ll be brought to the Sperry Software 365 Dashboard page:
Here you can see two Office 365 products, Schedule Recurring Email and Timed Email Organizer
This is where all your subscriptions are accessed. Today, there is only the Schedule Recurring Email and the Timed Email Organizer are shown but in the future, as we add new services, they will appear here.
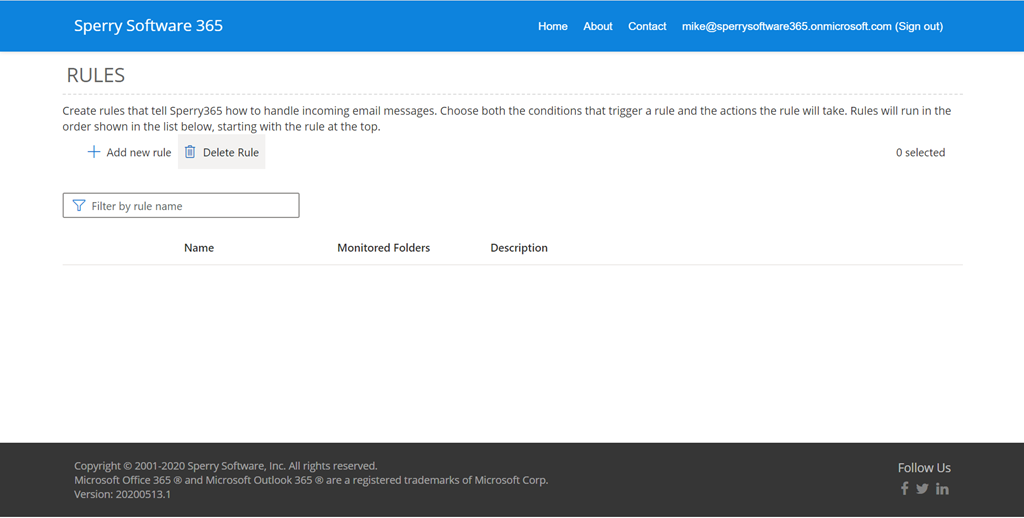
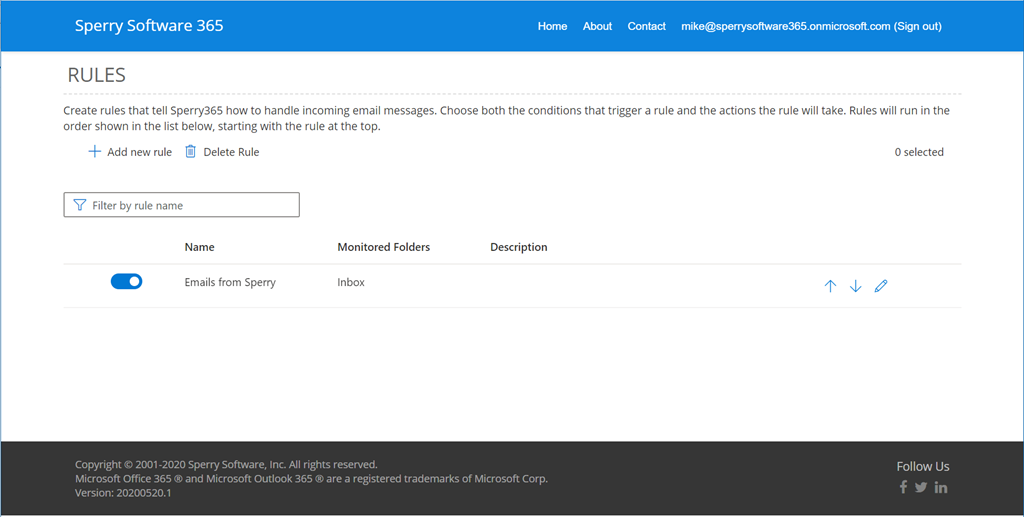
Clicking on the Timed Email Organizer button brings you to the list of your rules:
[This is where all your rules will appear.]
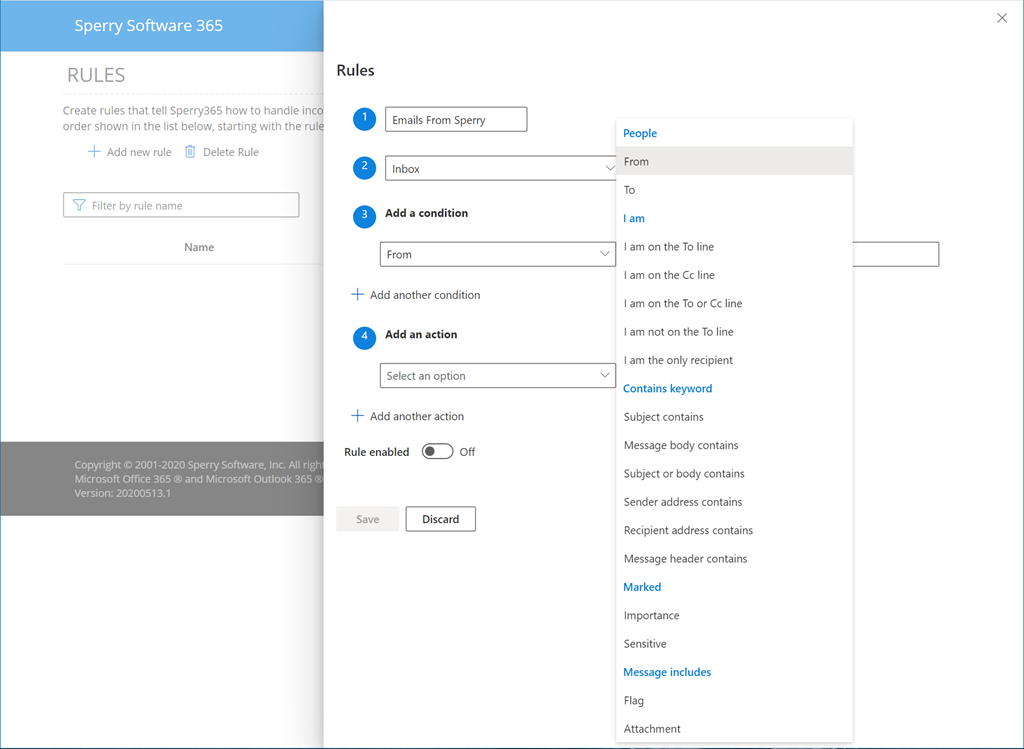
To create a new rule, click on the Add New Rule button, which will bring you to the Create New Rule view:
[Here is a list of the rule conditions.]
This is where you add the details to your new rule. You fill it out like normal (including a rule name, which will be shown to you back on the previous screen so that when you view the list you can remember what that rule is for). As you can see there are many conditions and we are adding new ones continuously.
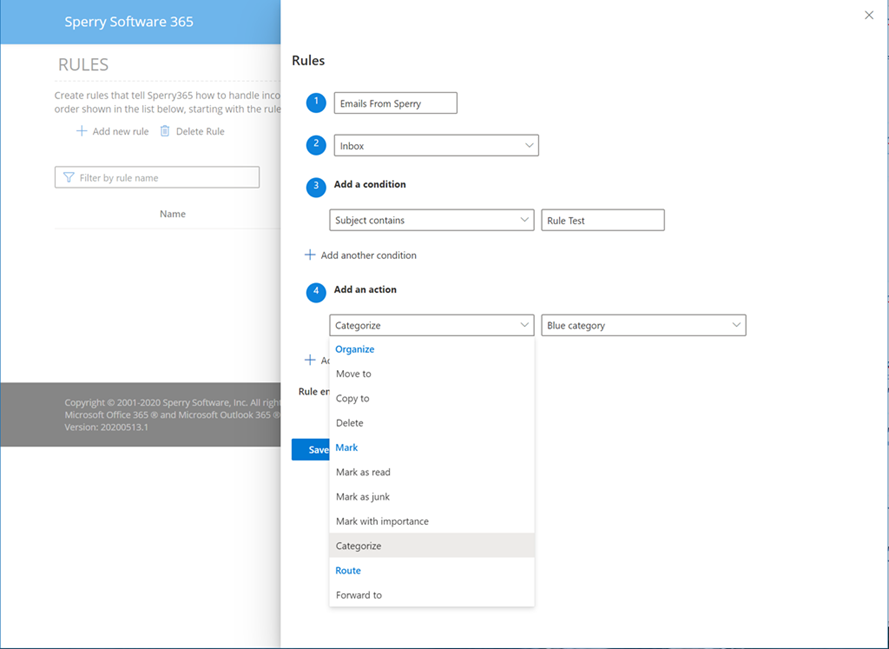
Similarly, here is a list of the available actions:
[This is a list of the actions a rule can take on the email.]
In our case, we are going to create a rule to add a red category to any email that has the words “Rule Test” in the subject. Here’s the example rule all filled out:
[This rule is ready to be saved.]
Once everything looks good, click the Save button. You’ll be brought back to the dashboard and you can see the new rule:
[Note: you can click on the column headers to sort by that column.]
And that’s all there is to it! Now just send an email to yourself with the subject “Rule Test” and in a few minutes the rule will take effect.