Specifically, navigate to the Integrated Apps feature (which may not be immediately visible – in that case you need to pull down the little arrow next to Settings):
In the above image, Step 1 is where you can find the Integrated Apps feature in Microsoft Admin Center. Next, click on the Safeguard Send for Microsoft 365 entry at the bottom (Step 2), and finally click the Update add-in link (Step 3).
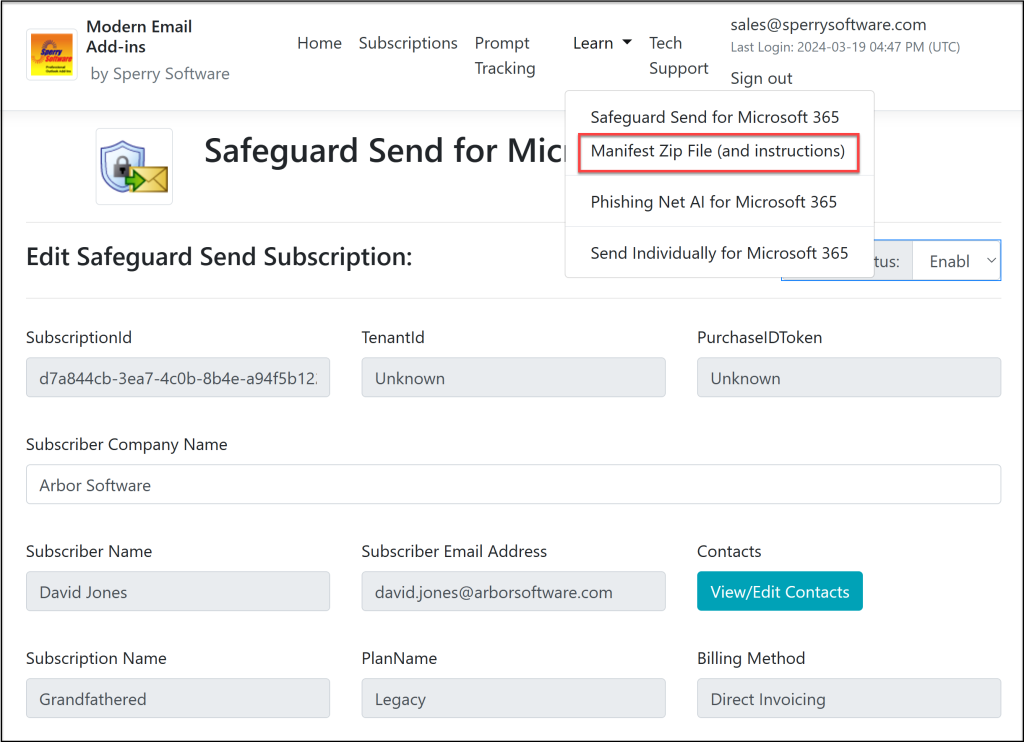
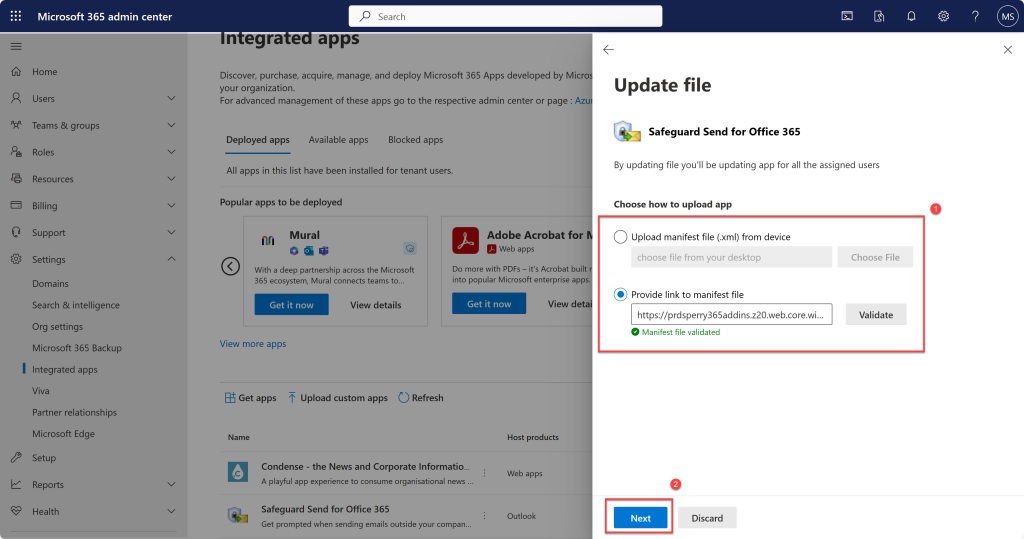
In this next image, either provide the link to the manifest file to the version you want to install or provide the file directly. You should have either the link or the zip file containing the manifest file from your communications with Sperry Software about your upgrade, or you can get the latest one from the Learn link in your dashboard account:
Just open a tech support ticket if you still can’t obtain it, need a version that is NOT the most current, or need to update your corporate customized version. You’ll know that you have a corporate customized version because you will have your corporate logo show up in the warning prompt (where the stop sign appears in non-customized versions).
Once you have the manifest file or a URL pointing to it, enter it and click Next:
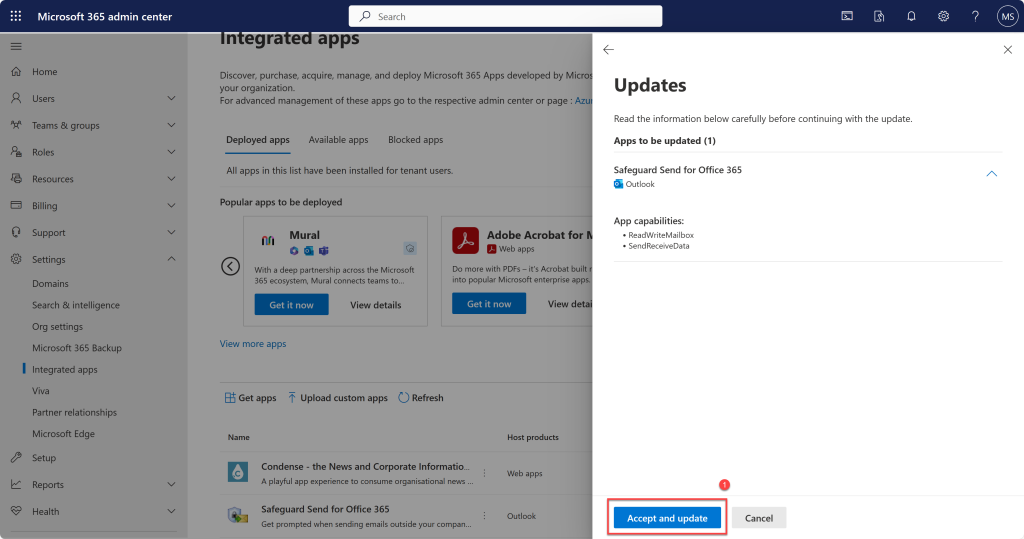
At this point Microsoft Admin Center asks you to confirm permissions (which may have changed since the last version, but this is rare). Click Accept and update to continue:
If everything goes well, then Microsoft Admin Center reports that the add-in was updated and the process of rolling it out to all users begins. Click Done.
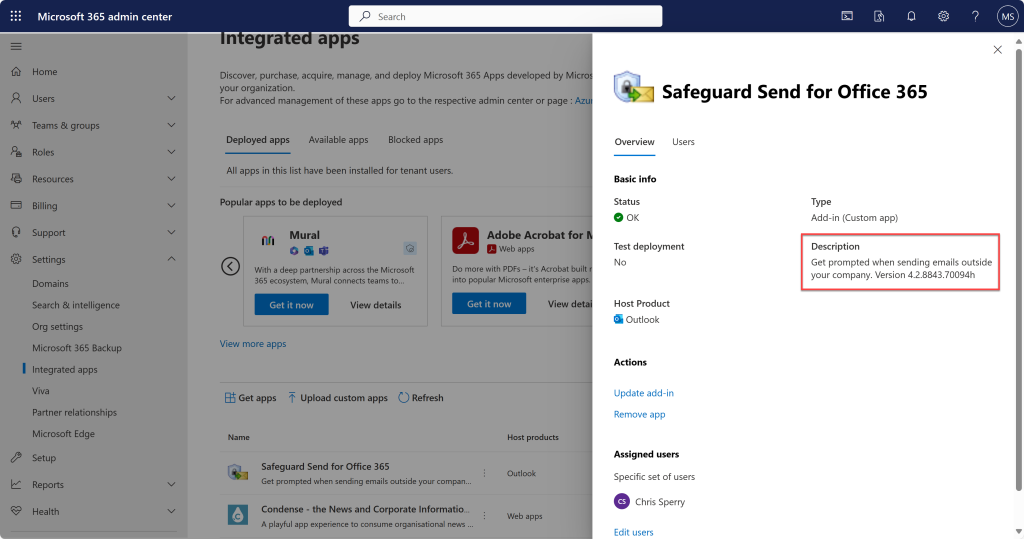
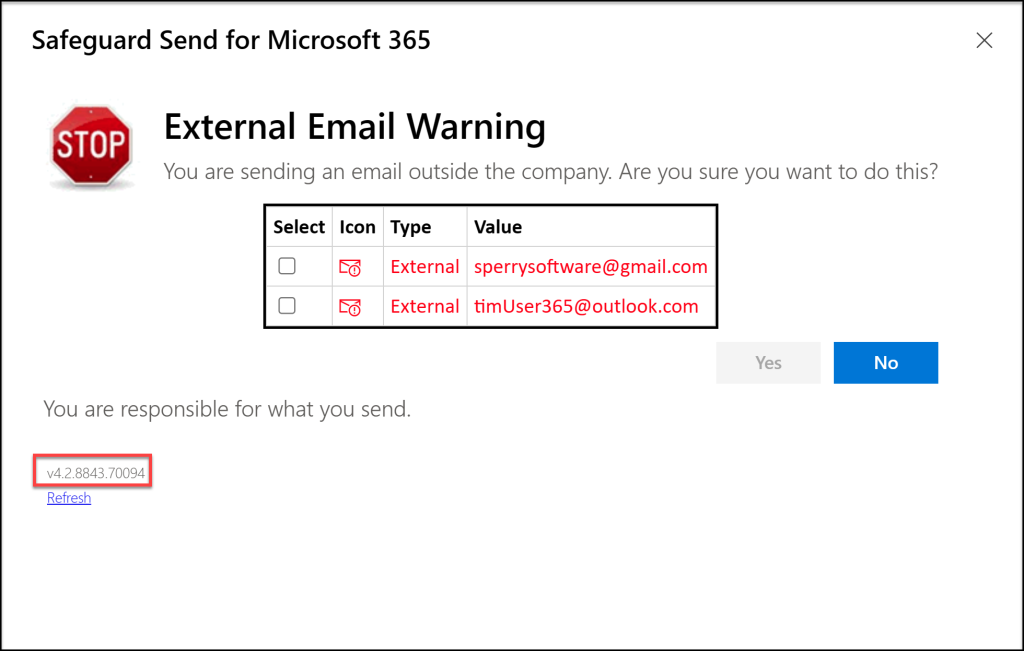
In the past, Microsoft has reported that it can take up to 12 hours to fully deploy. You’ll know that you performed the process correctly because the description includes the version number.
Further, you’ll know that users are beginning to see the newest version by looking at any warning prompt by any user:
The version shown should be the same (or nearly the same) as that in the description field in Microsoft Admin Center.