Getting Started with Safeguard Send for Microsoft 365
Need help getting started with our Safeguard Send for Microsoft 365 add-in? This guide explains how to install and use the Outlook add-in. This modern web app helps you to avoid mistakes by putting up a warning prompt whenever you go to send an email outside your company, or if there’s a certain number of recipients, or a certain number of attachments (or any combination of these conditions).
Note that this app is similar to the Outlook (desktop) version of Safeguard Send, except that in addition to working in Outlook desktop, it also works in Office on the web, and on Macs. However, this version does not support phones (yet!) due to a Microsoft limitation.
There are minimum requirements to run the add-in. In particular you must have one of the following platforms:
- Outlook 2013 or later on Windows
- Outlook 2016 or later on Mac
- Outlook on the web for Exchange 2016 or later and Office 365
- Outlook on the web for Exchange 2013
- Outlook.com
Assuming you have one of the clients mentioned above, you can install the add-in by following our add-in installation guide.
Once installed you’ll be able to login to your dashboard to see your subscription account details and more importantly to be able to edit the rules that Safeguard Send uses to decide when to prompt you. By default, a rule is created for you when you first sign up that simply displays a warning prompt like this:
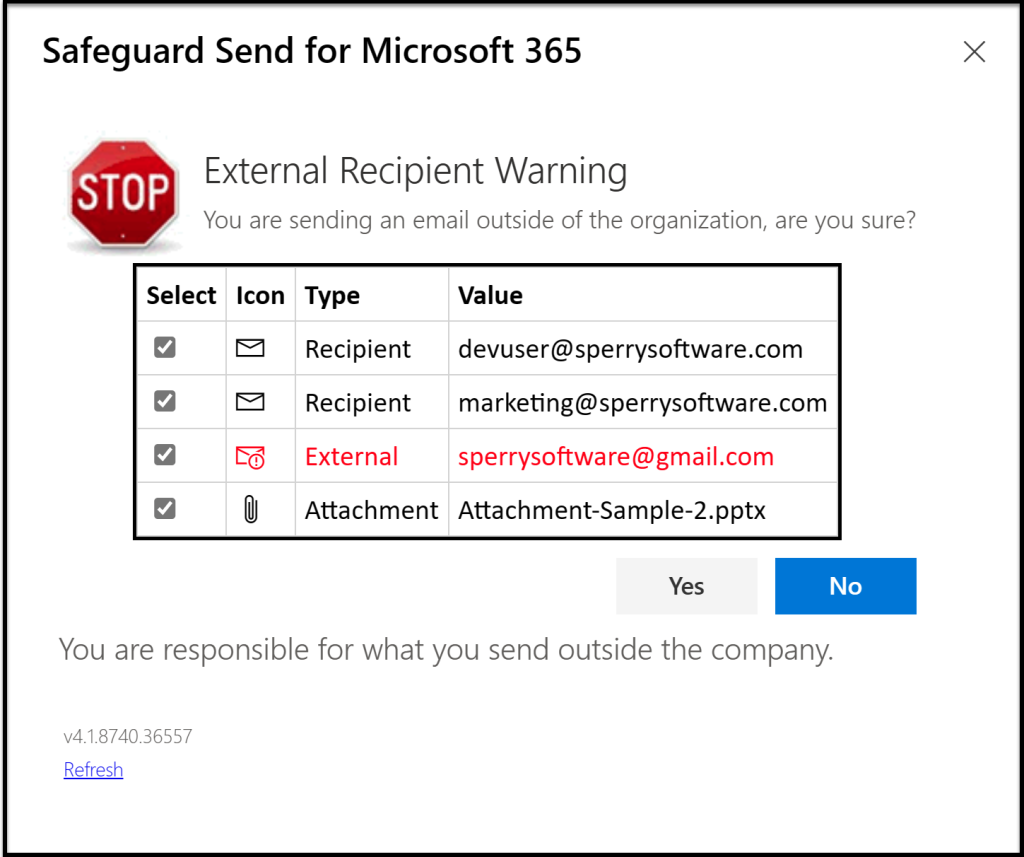
In the above example prompt, a Sperry Software employee has just clicked the Send button on an email that has 3 recipients and 1 attachment. One of the recipients is a Gmail address and is outside the company, and so is highlighted in red so you can easily see it.
Note that the individual recipient’s email addresses are displayed, not just their email “display names”. This helps to prevent mistakes by allowing users to examine the email addresses carefully to be sure that this is what is intended.
And that’s it! A super simple path to a more secure environment.
At this point you might be asking how you can change the warning prompt, say the words used, or possibly something bigger like only have the warning prompt show when there is also an attachment (like we’ve shown above), or even if one of the recipients has a domain ending in gmail.com or hotmail.com, etc. To do this, the add-in uses one or more rules that you can control via your dashboard. Remember that your dashboard account was created for you when you first signed up with a default rule and you can edit that rule or create more rules for more fine-grained control. You can learn more at our Getting Started with your dashboard account guide.