Installing Safeguard Send for Microsoft 365
This guide explains how to install the Safeguard Send Add-In for Microsoft 365. These instructions are for the cloud version, not the desktop version of Safeguard Send.
This guide is for individual users. If you are an administrator follow this guide from Microsoft to install this add-in for one or all of your users. It covers how to deploy an add-in using the Microsoft 365 Admin Center‘s Integrated Apps feature. Note that you can also deploy an add-in through the Exchange Admin Center, but in that case you can only deploy to your entire organization all at once (as opposed to the Integrated Apps which allows more fine grained control over who gets it).
This guide only covers how to install the add-in. Follow these instructions to learn how to remove the add-in.
How to install the add-in into your Microsoft 365 email account
The simplest way to install it is to click the “Get It Now” button from the Safeguard Send listing in Microsoft AppSource . Doing it this way installs it into your email account, that is, you will see it in desktop Outlook, Outlook on the Web, and if you use Macs, in your Mac as well:
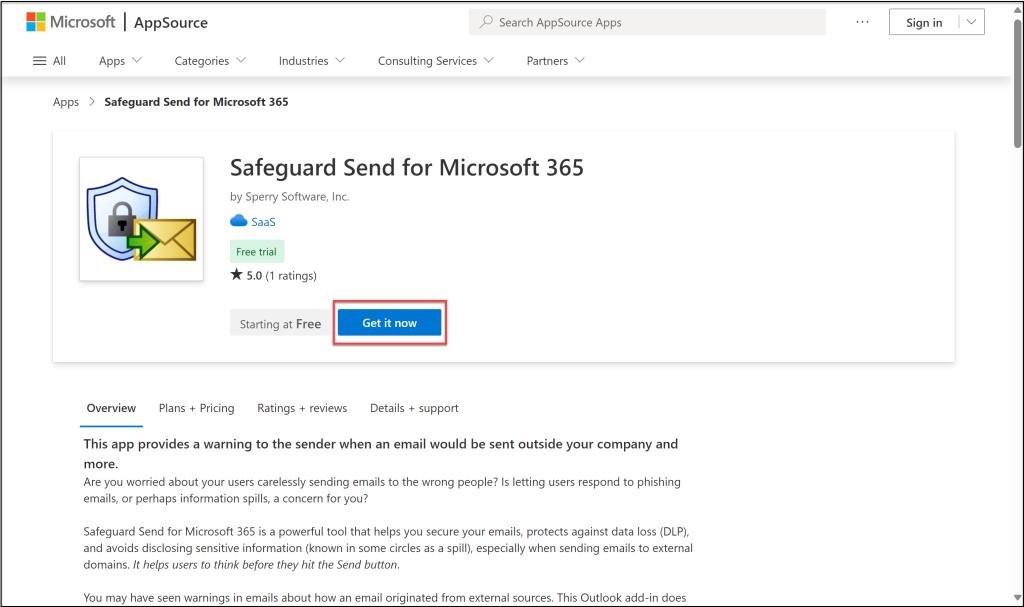
Using the AppSource method automatically creates your dashboard subscription and your first default rule on your behalf and is the recommended way to get started (other than following the same instructions but using our Azure Marketplace listing instead).
Otherwise, from the desktop client Microsoft still allows you to install add-ins directly from Outlook.
Note: Microsoft recently updated the method used to install an add-in into Outlook, a process called “side-loading”. This guide now uses this new method.
In desktop Outlook, click on File…Info…Manage Add-ins:
Note: Be sure to click on Manage Add-ins, not Manage COM add-ins (which is an older technology)

Sign into your account if necessary. This brings you to the web based version of Outlook.
Click on the My add-ins link:
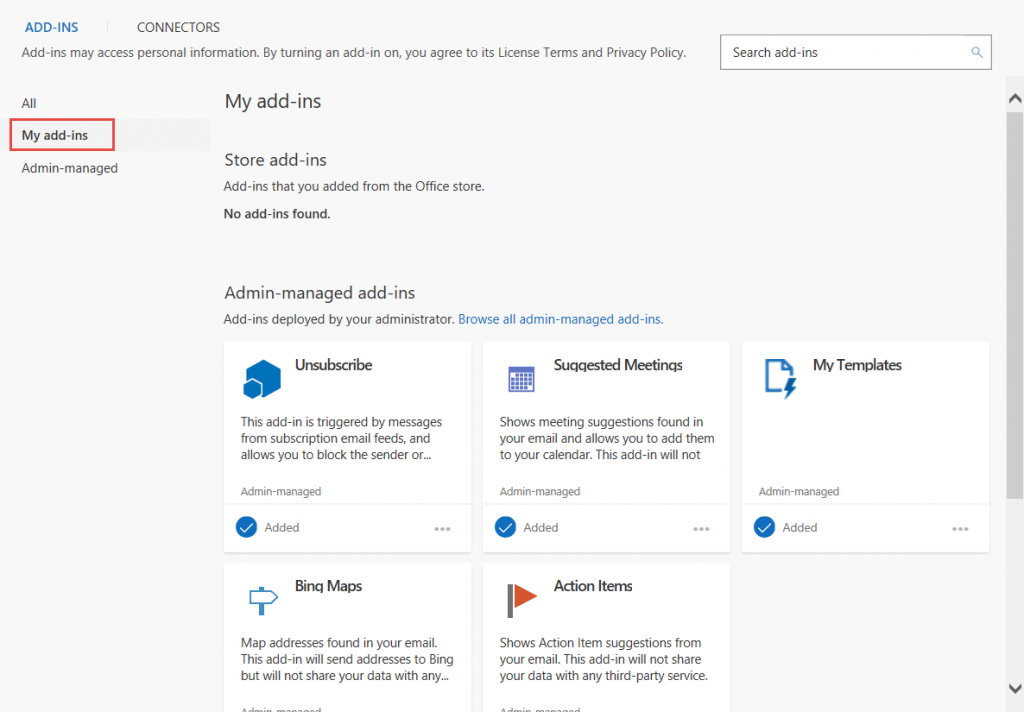
Scroll down to the Custom Add-ins area.
Click on +Add a custom add-in.
Choose Add From File…
We have packaged up the manifest file you need into a zip file. You can download the zip file and extract the manifest.
The zip file containing the manifest can be found in your account in your dashboard (under the Learn link at the top of the page).
Click Install.
As mentioned, the above instructions work with desktop Outlook (Windows or Macs), and on the Web. Once it’s installed, you’ll see it everywhere it is supported; it’s not necessary to install it on the desktop, then on Office on the web, etc., because Outlook now takes care of getting the add-in on all your clients.
Need more help? See our guide on Getting Help for Office 365 Applications or Contact Us.