This guide is for IT managers and administrators. If you wish to install the add-in as an individual user directly into Outlook, please reference this article.
Before deploying the add-in, it’s best to plan your deployment first – particularly if you are migrating from the desktop version of Safeguard Send. Our Deployment Best Practices Guide can help you plan your deployment whether you are migrating from a previous installation or installing to a brand new environment.
As an IT manager or admin, deploying an Outlook add-in can be a complex process, but it doesn’t have to be. In this article, we will provide two methods to deploy an Outlook add-in, based on the Safeguard Send add-in for Microsoft 365. The first method is using the Microsoft 365 Admin Center Integrated Apps feature, and the second method is using the Exchange Admin Center.
In general, using the Microsoft 365 Admin Center is the recommended approach because it is more modern, and supports rolling out to individuals, groups or an entire tenant all at once. By contrast, the Exchange Admin Center only allows you to deploy to all users in your organization. However, it also has the ability to make it optional or mandatory, and can be an initial state of disabled by default or enabled by default similar to the Microsoft Admin Center. To deploy add-ins using the Exchange Admin Center, please follow these instructions instead.
Deploy Add-ins Using Microsoft 365 Admin Center Integrated Apps Feature
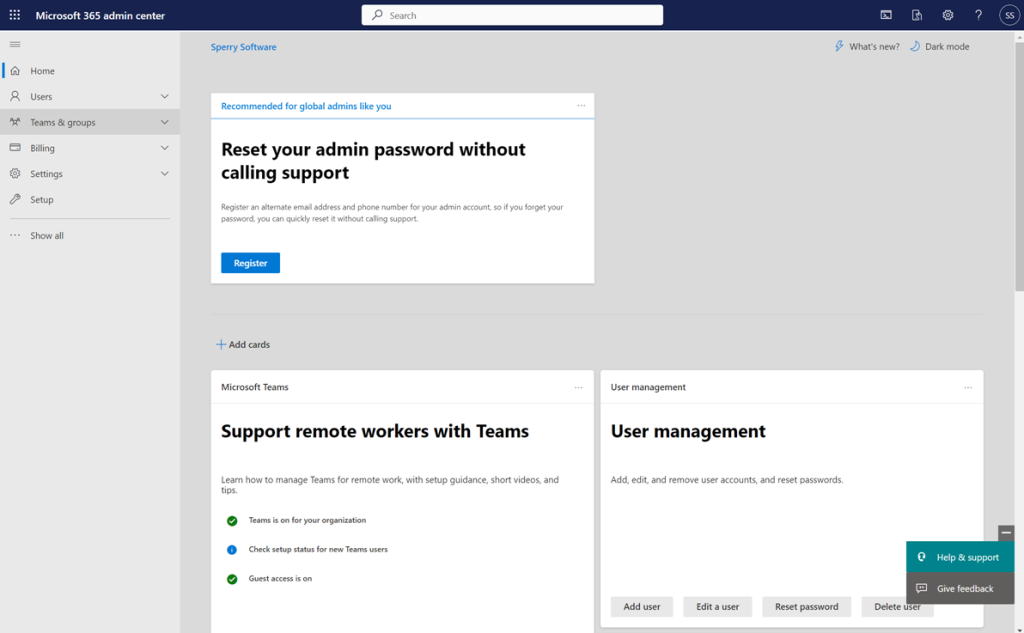
Step 1: Sign in to the Microsoft 365 Admin Center. Navigate to the Microsoft 365 admin center at https://admin.microsoft.com, and sign in with your admin credentials
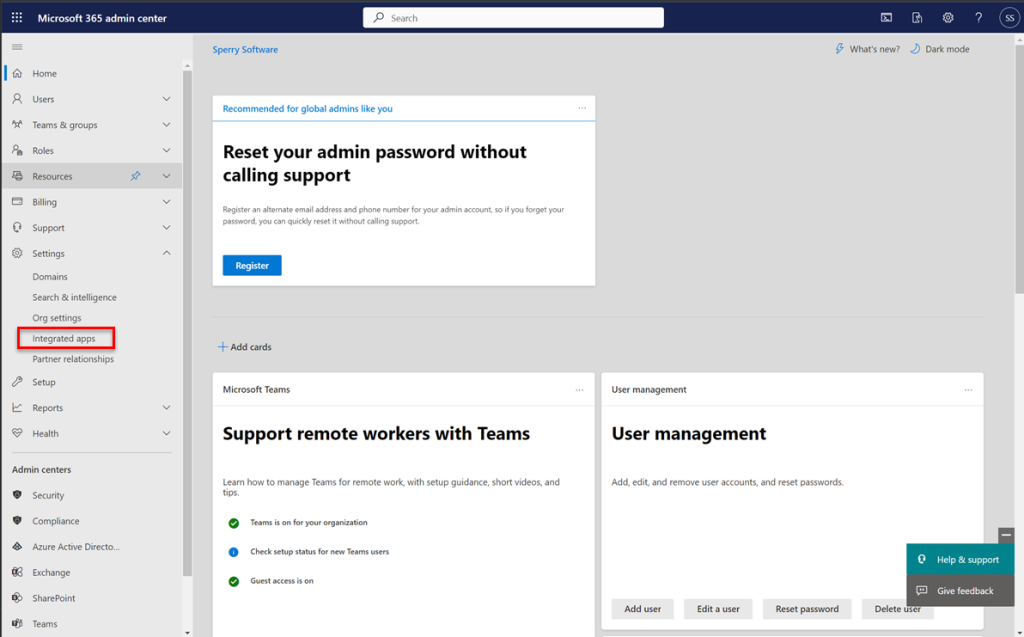
Step 2: Navigate to the Add-ins page. In the left pane, select Settings > Integrated apps. If you don’t see the Settings option in the left hand pane, instead select Show All. This will reveal all the available options, including Settings
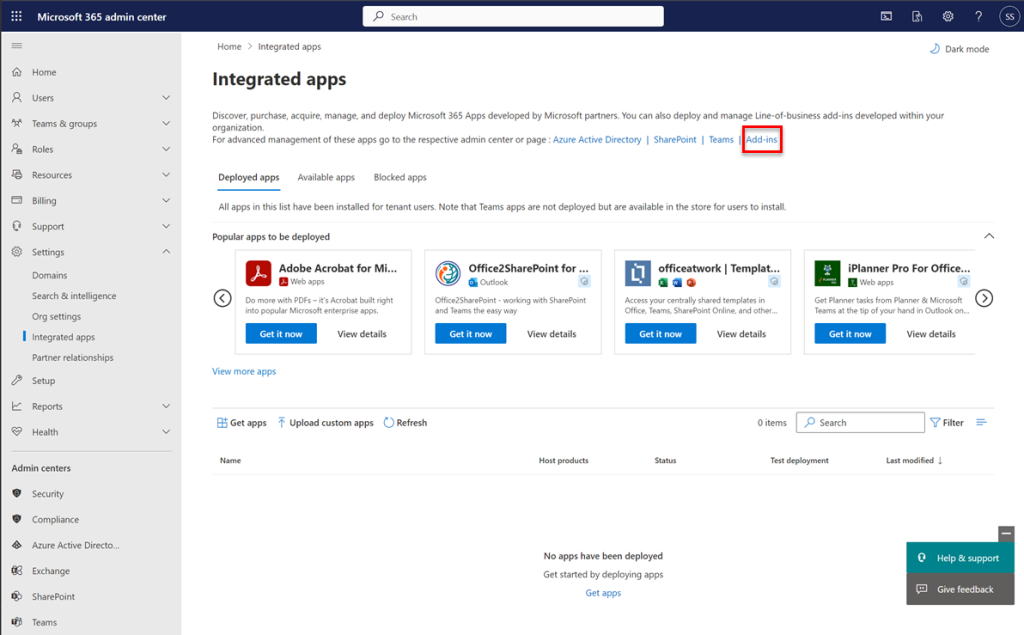
Step 3: Click on Add-ins (the link at the top):
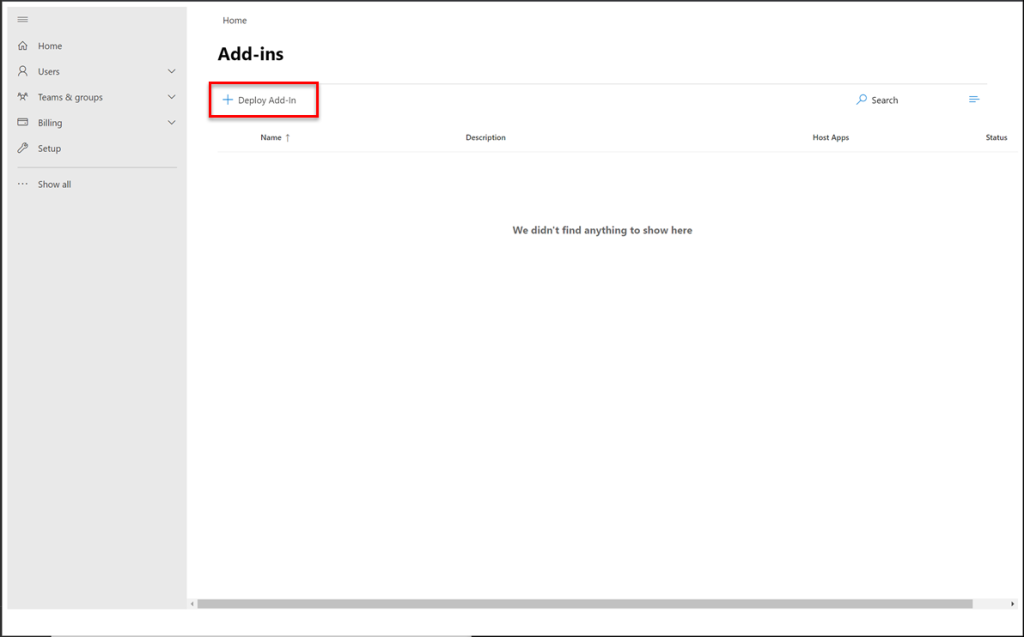
Step 4: Click the Deploy Add-In link, then click Next:
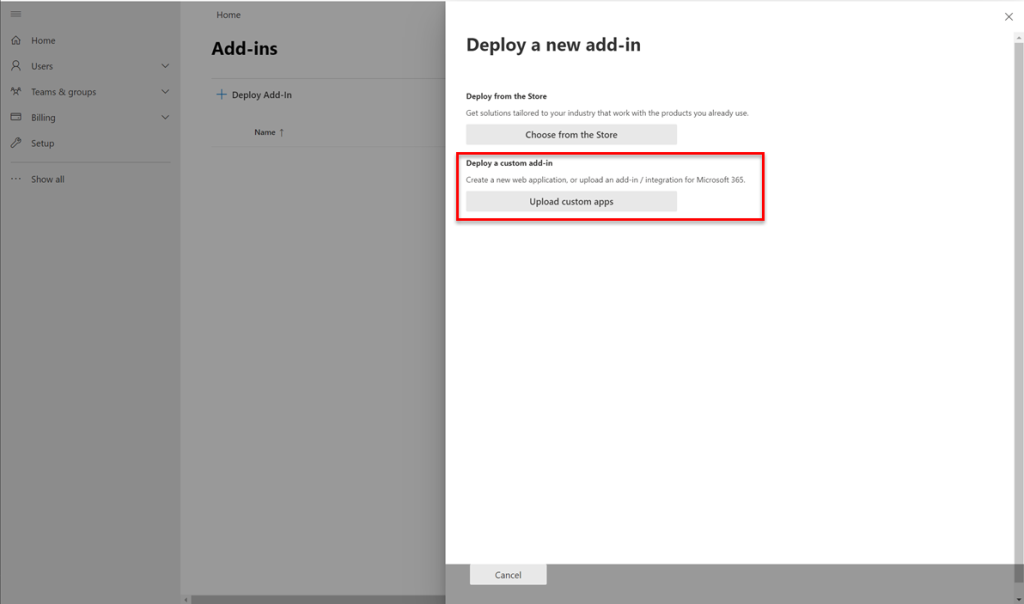
Step 5: Under the Deploy a custom add-in option, choose Upload custom apps
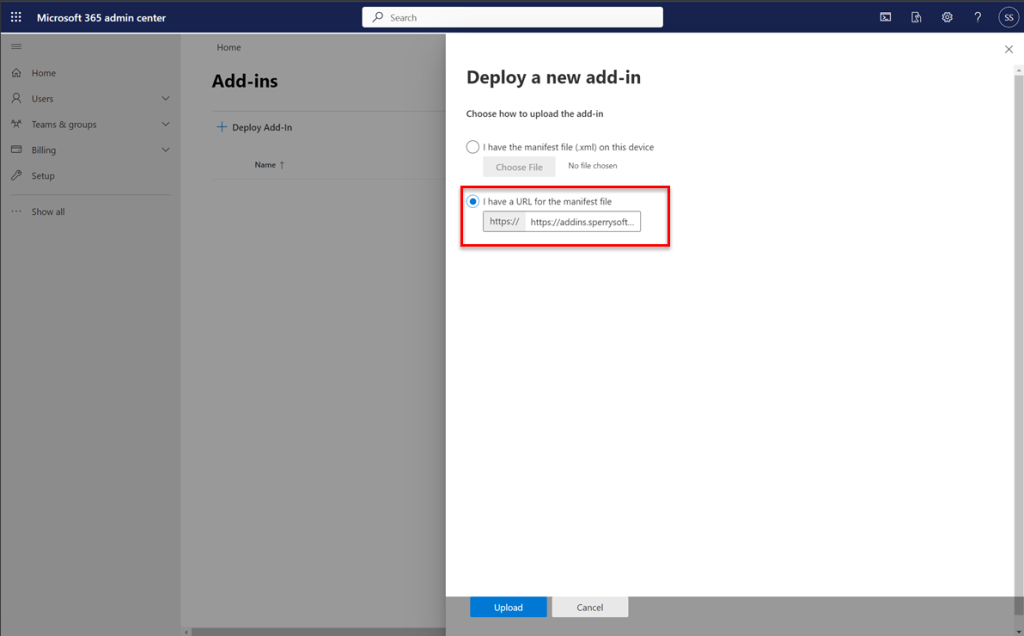
Then select the option “I have a URL for the manifest file” and paste in the URL found in your dashboard account (under the Learn link at the top of the page). You can also choose to download the zip file, unzip the manifest.xml file and select that option if you prefer.
Note: Be sure to include the https:// in the URL field. At the time of this writing, even though the https:// is implied that it will be accepted, it will not and an error will occur.
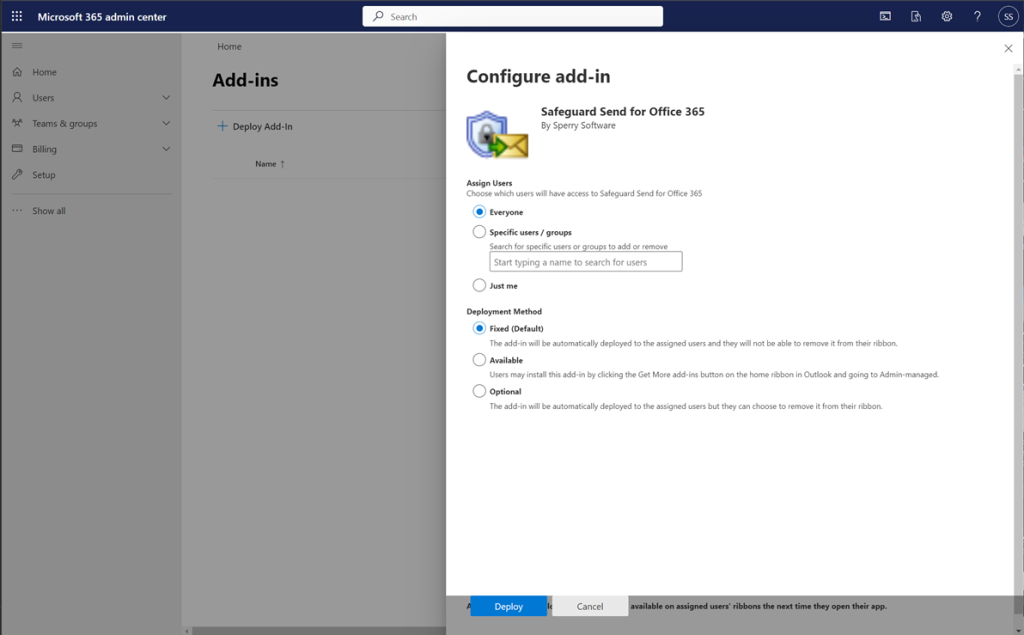
Step 6: Click Upload, then Assign Users (Everyone, Specific Users/Groups, or Just you) and also a Deployment Method (Fixed, Available, or Optional)
Step 7: Verify the installation. Verify that the add-in has been successfully installed by logging in to Outlook as one of the assigned users and sending an email outside your company (which is the default rule, even without having ever logged into your dashboard).
Note that it can take up to 12 hours to see the add-in in Outlook after deploying so be patient. After that time, if you still don’t see the add-in please check this article about how to diagnose users not seeing add-ins.