Imagine this: David Jones, the IT Manager at Arbor Software, wants to add an additional rule for his company. He wants this new rule to warn his users whenever they send any email outside the company with more than 5 recipients, but how can David add this new rule without rolling it out to everyone immediately?
The secret is to create a rule set for an email address instead of editing the rule set of your domain. This way, any rules created will apply only to that one email address instead of your entire company domain. This is because the way the add-in works under the hood is that when an email is sent, it first looks for any rules that apply to that specific email address. If it doesn’t find any, THEN it looks for any rules that apply to the company domain.
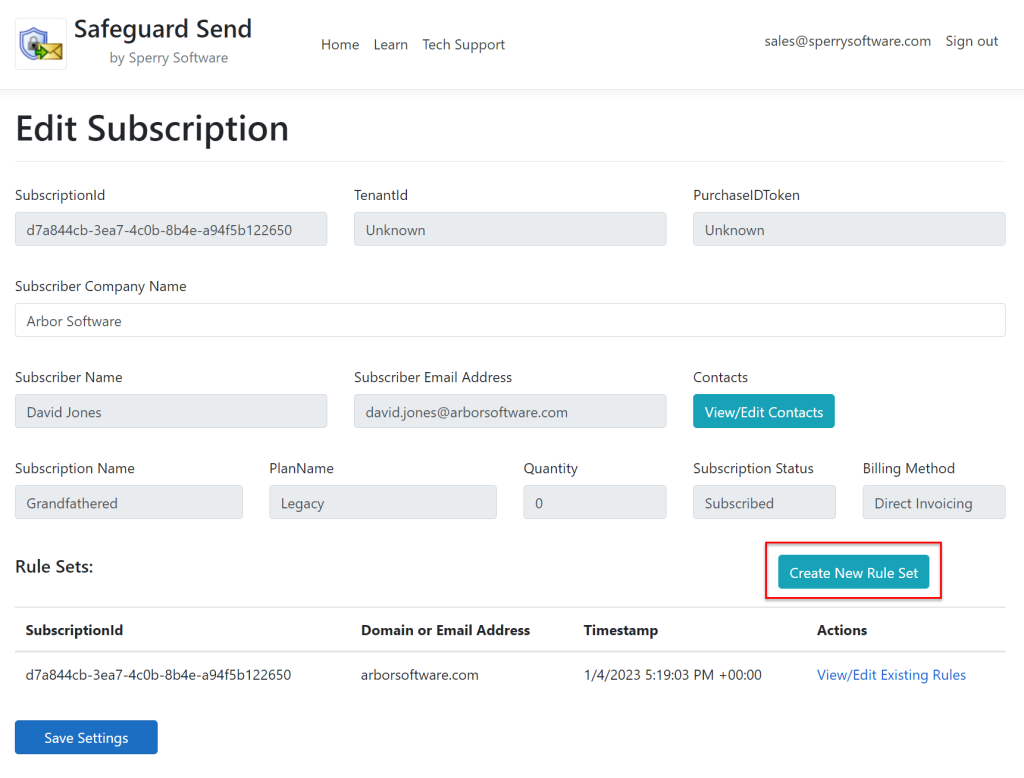
Going back to our example, rather than editing any existing rules for his company domain, instead David clicks on the Create New Rule Set button.
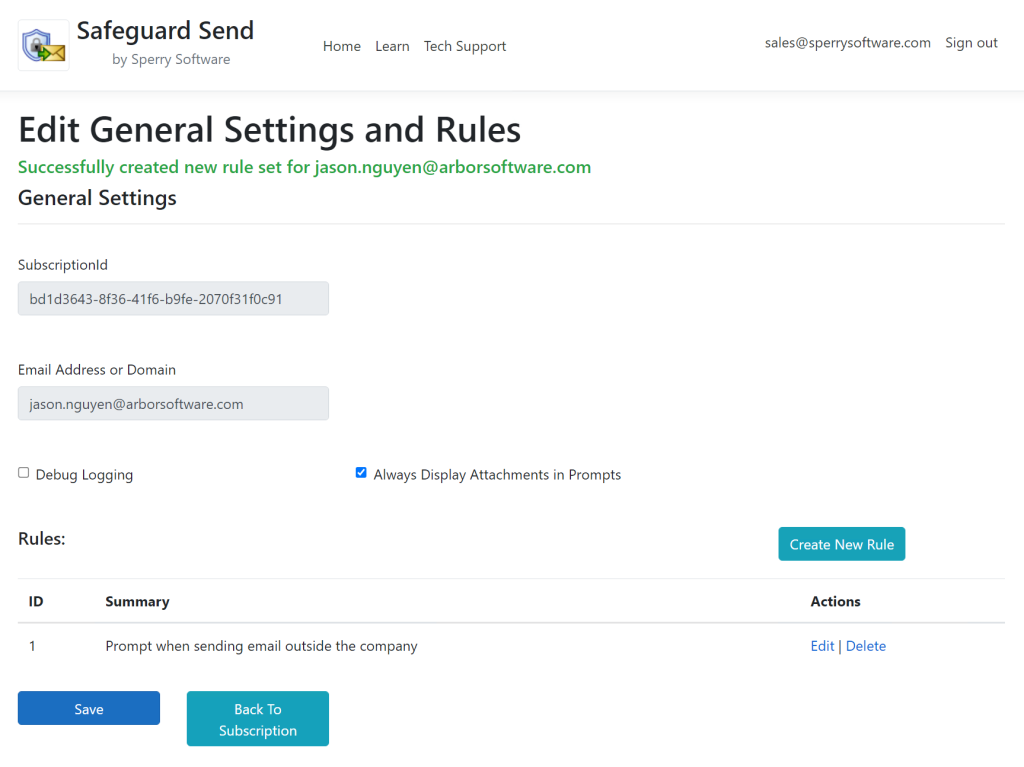
David is brought back to his company’s main subscription page, where he can see the new rule set for Jason. A default rule is created for Jason, and David can edit this new rule by clicking on the Edit link:
Note the green success indicator at the top of the window, letting you know that the rule set was successfully created.
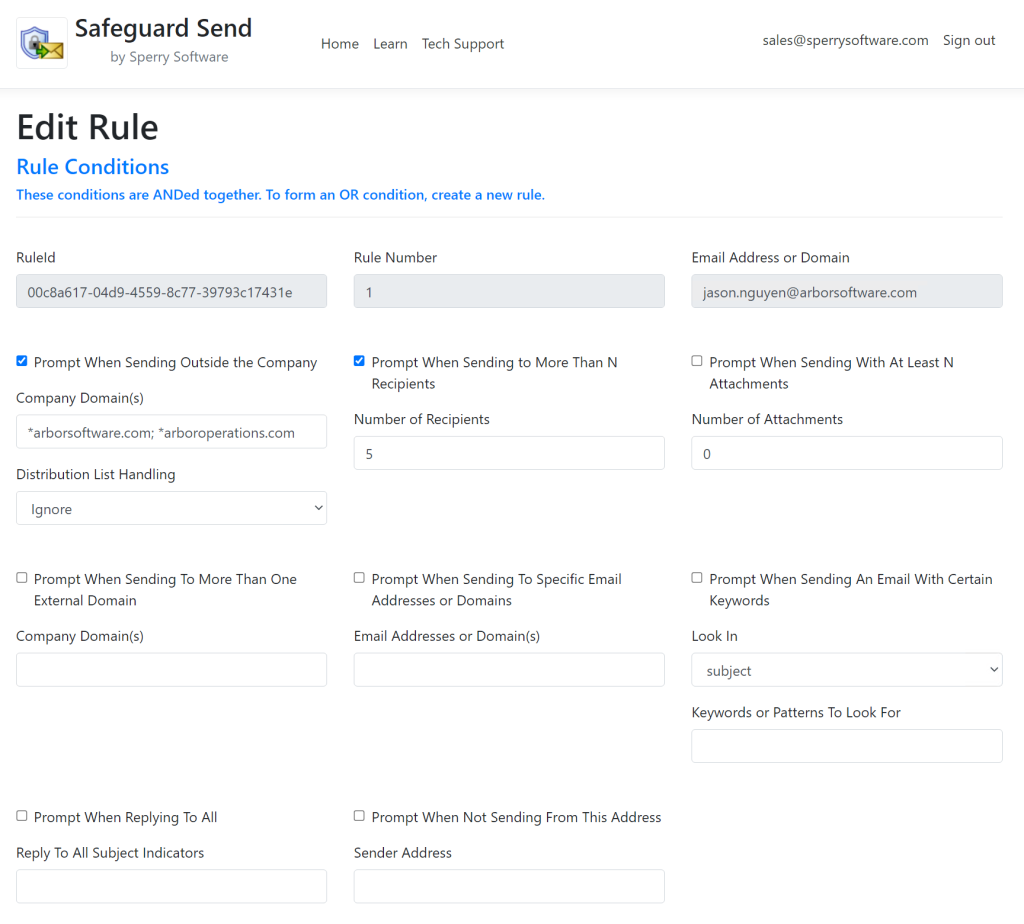
Because David wants this new rule to apply anytime Jason sends an email outside the company with 5 or more recipients, he checks the box “Not having domain(s)” and fills in the companies two domains (arborsoftware.com and arborsoftware.net) and also checks the “Number of Recipients” box and fills in the number at which to warn, in this case 5:
Note that a wildcard (an asterisk) is placed immediately before each domain in the Company Domain(s) field.
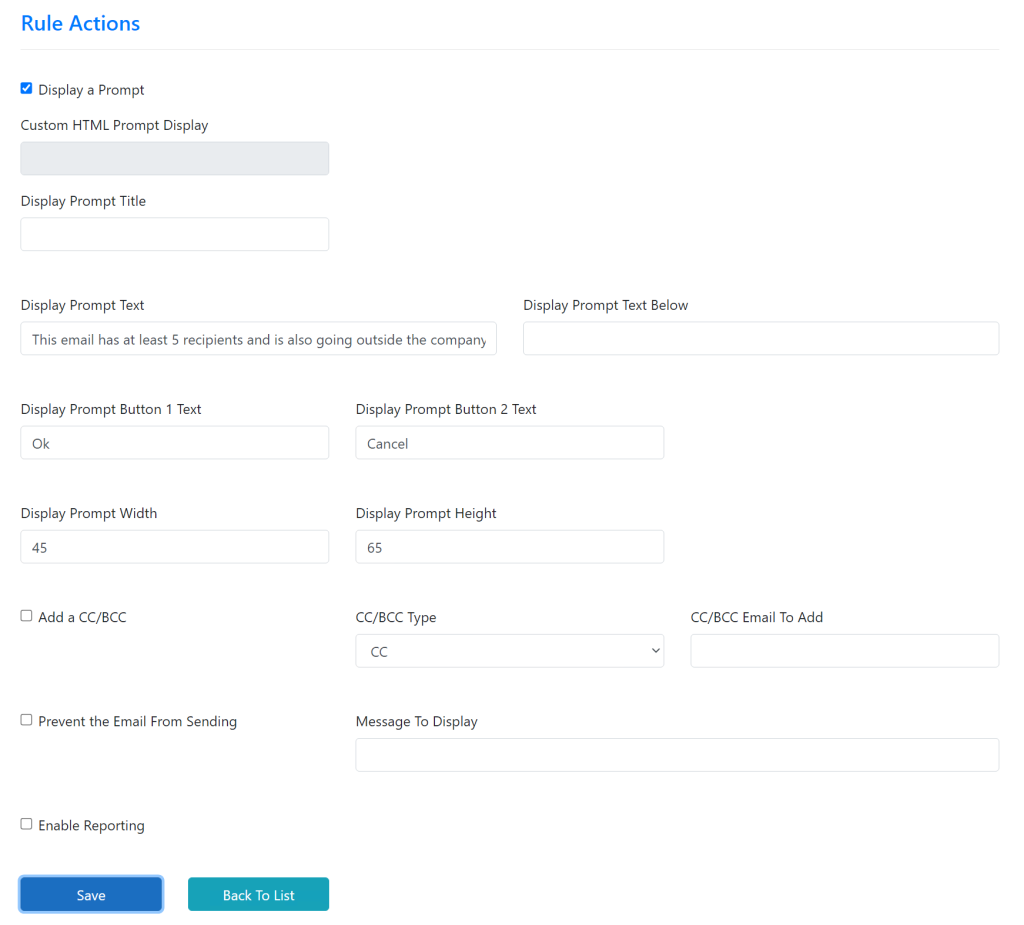
David then scrolls down to the Actions area, and adds prompt text. Notice also that because David has a slightly sterner warning prompt that is not a question, that he changes the buttons to be Ok/Cancel and not Yes/No:
Note the button text has been changed from the default “Yes/No” to “Ok/Cancel”.
You can’t see the entire text prompt here, but the whole thing reads:
“This email has at least 5 recipients and is going to go outside the company. Please review it carefully.”
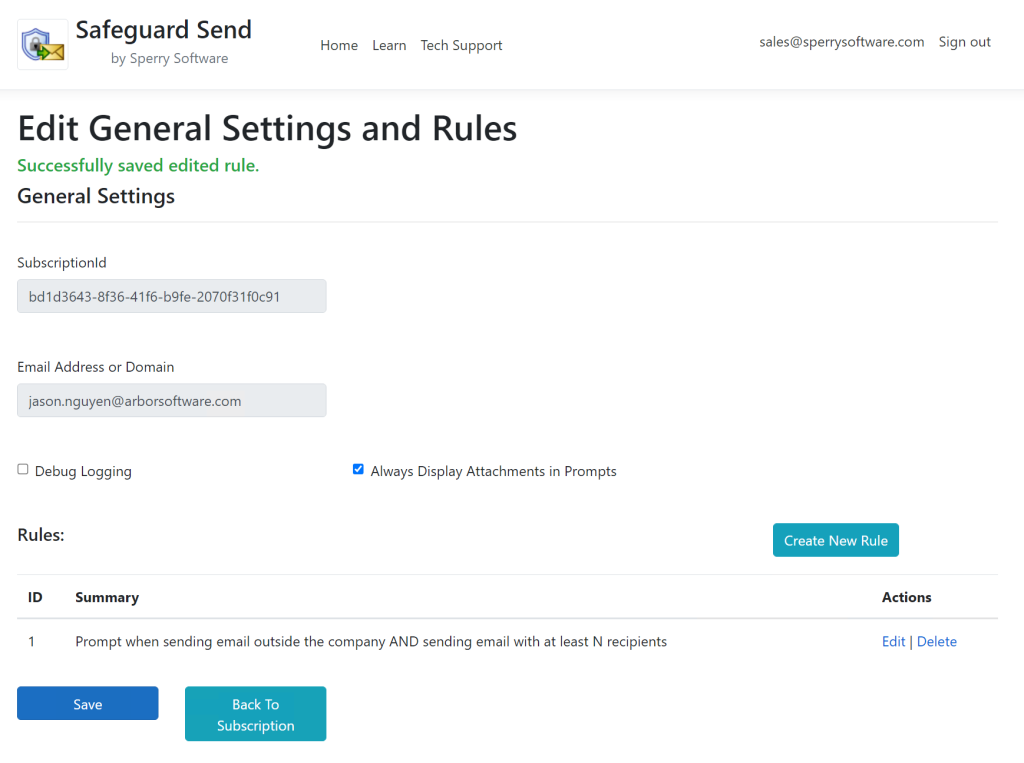
Finally, David clicks Save, and sees that the new rule is created:
Note again the green text indicating success at the top of the window.
And finally, because Jason already has the installed in his Outlook account, David can tell Jason to test the rule by creating an email to 5 recipients not in the company, where he will see the prompt:
[Image of new rule prompt in Outlook]
As a recap, you can create a new rule set for an email address knowing that the rules will only apply to that email address. This is because the way the add-in works under the hood is that when an email is sent, the add-in first looks for any rules that apply to that specific email address. If it doesn’t find any, THEN it looks for any rules that apply to the company domain.
Finally, after David and Jason are satisfied with that the rule is working as intended, he can add it to company’s main set of rules (i.e., to the rule set that applies to the entire domain). While it must be added using the same process described above, Jason’s existing rule can be referenced.
Note that as a final act, David can delete Jason’s rule set so that Jason’s add-in will now fall back to the entire company’s rule set along with everyone else.